
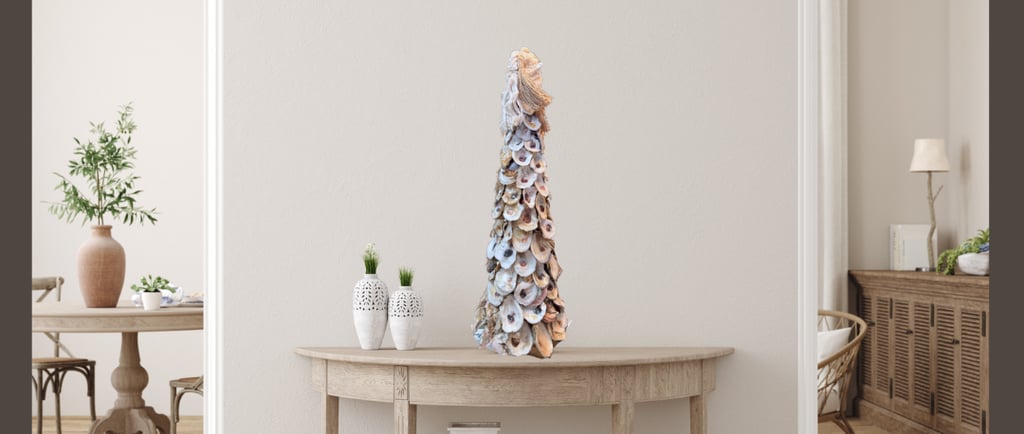
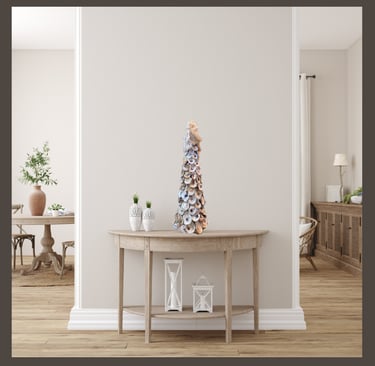
How to Create an Oyster Christmas Tree
Hi all! I recently created a beautiful Christmas Tree out of oyster shells and was overwhelmed by the number of people who wanted one. I decided to create a video of how to make these natural sculptures.
Tonia Kay
12/16/20244 min read
Step 1. Wear gloves for each step until the shells are sealed! Find a location where you can select oyster shells and even other complimentary shells by size, color, shape, and weight. If you are not near such a location, you can purchase shells from Etsy.
Step 2. Select a variety of shells if possible so that larger shells support the bottom of the tree and get smaller going up the structure.
Step 3. Put the shells in a bucket or vat. Fill with water and pour a generous amount of bleach into the water. Make sure you shake or create a motion that mixes the bleach thoroughly to reach all surfaces. Be aware and understand that clothing, shoes, furniture, etc. may come in contact with bleach and can be ruined so prepare accordingly. I would do this in an outdoor area. Let the shells soak for 24 hours.
Step 4. Spread the shells out on a cement surface and wash thoroughly to remove the bleach. Allow the shells to dry for at least 48 hours in the sun. Oyster shells are made of layers of shell and may take some time to completely dry. If you do not wait, it is possible that the glue will not be effective.
Step 5. Once they are dry, set a styrofoam cone onto a level surface and use a hot glue gun to adhere the largest shells to the surface near the bottom of the cone. This will further stabilize the cone by creating a larger, heavier base. Try to piece the large shells as closely as possible to each other. You do not want gaps between if possible. It will be a matter of positioning each oyster shell to its best advantage. This will take time, but will be worth it in the end. Continue to do this using smaller and smaller shells as you move towards the top of the structure. Take your time! Leave an uncovered area of about 2 or 3 inches as desired.
Tips:
position the oyster shell then press it into the styrofoam surface creating an indention in the foam. This will help to stabilize the shells as well by creating a better bond when you add the resin.
Use a large, cordless hot glue gun. Here is a link to the one I use in the video. I don’t know what I would do without it! So much easier than dragging a cord through your work constantly. LARGE CORDLESS HOT GLUE GUN. I use the Ryobi chargeable hot glue gun and love it.
ONLY cover half of the structure before moving to Step 6.
Step 6. It’s time to seal the shells! This is the most rewarding part, but also the most tedious part. Mix approximately 4 to 5 oz of resin thoroughly. Make sure your measurements are extremely accurate or you will get a stick, gooey mess that will not cure or dry. Follow the instructions that come with your resin. Do not worry about bubbles. You will not see them for this application. I typically will use a blow torch or alcohol to get rid of them but alcohol will literally dissolve the styrofoam and the blow torch will melt it, so let it go. I don’t see any bubbles on mine, and I just used the resin as it was. Here is a link to the kind of resin I used, Art Resin. This is the only resin I use because it is the least toxic that I know of and is supposed to be completely nontoxic after it cures for 48 hours. I allowed my resin to dry for 24 hours before continuing with the process.
Step 7. This is the embellishment/decorating portion of the project. Find any large gaps and use burlap ribbon or other smaller shells, really anything you desire, to fill them in using hot glue. Here is a link to the items I used: BURLAP RIBBON, WOODEN BEADS, NATURAL COTTON ROPE
Step 8. Take the natural cotton rope and measure the length needed by wrapping it around the top rim of the cone then let the extra hang over the side approximately 3 inches. Don’t cut yet! Use burlap string or wire rope to secure both ends of the crown section only before you cut the rope to allow for the 3 inch tassel section. Once the crown ends are secure and cannot unravel, you can cut the rope beyond that point to create a 3 inch tassle with the excess rope that will hang to the side.
Step 9. Create a crown using the rope piece you just created by wrapping the twisted portion around the top rim of the cone. This should create a small nest where the wooden ball will rest. Glue this in place securely. You will have to hold this in place for a while until it dries.
Tip: The rope should rise beyond the surface of the top of the cone to create a nice open area for the wooden ball.
Step 10. Put a generous amount of hot glue on the top point of the cone, then place the wooden ball snug into the nest created by the rope. While the glue is wet, you can push either long pearls or wooden beads all around the ball to create a crown effect.
Step 11. Using small, short tassels or any fringe type trim you desire, cover the area between the shells and the crown using hot glue.
I hope this was helpful to you. Check out the Youtube video on my channel, Art by Tonia Kay, if you are more of a visual learner. Enjoy your beautiful shell Christmas Tree! post pictures of it when you are finished in the comments on Instagram. I can’t wait to see these!
This article contains Amazon Affiliate links that I do get a small commission from. I promise to never mislead you about my recommendations which are genuine and feature many of the products that I use myself. It is just one small way to pull in a little extra money to support my many opinions.
Let's Stay in Touch!
Sign up to see my latest work and get discounts exclusive to my favorite followers. It’s FREE!
hello@artbytoniakay.com
©2023 The Guidry Gallery, LLC
All artwork is the sole property of The Guidry Gallery LLC, DBA ART by Tonia Kay and is held under copyright. Images, artwork, and contents of this website may not be copied, collected, or used for personal or professional gain without written permission from Tonia Kay Guidry.